User Guide & Setup Tutorial
Complete step-by-step instructions for QR Code Attendance Tracking By ConvertSharp.
Initialize Your Tracking Sheet & Linked Form
Open any Google Sheet™ document. In the top extensions menu, navigate to:
Extensions > QR Code Attendance Tracking By ConvertSharp > 📋
Initialize Attendance Sheet & Form (Sample).
The add-on will automatically configure your spreadsheet:
- Attendance Roster Tab: Pre-built roster columns:
Name,UID,Role,Time,QR Code,Status, andLast Scan Time. - Attendance Logs Tab: Ready to log every check-in/out with exact timestamp, GPS location, punctuality evaluation, device, and notes.
- Linked Google Form: Automatically creates and connects a private backend Google Form linked to your spreadsheet so students or employees can scan from their phone without requiring sheet edit permissions!
Add Members & Generate QR Codes Directly into Cells
In the Attendance Roster tab, enter your students, attendees, or employees:
- Name (Column A): Member's full name (e.g., David, Jack, Lucy, Mary)
- UID (Column B): Unique Student ID or Employee Badge Number (e.g., 4864, 4195, 7325)
- Role (Column C): Department, class, or role (e.g., Student, Intern, Staff, Manager)
- Time (Column D): Scheduled start time in 24h format (e.g., 09:00, 08:30)
Once your roster is filled, click:
Extensions > QR Code Attendance Tracking By ConvertSharp > 🏷️
Generate Attendance QR Codes in Sheet.
The Add-on automatically inserts crisp, high-resolution QR codes directly into Column E using native
=IMAGE(...) formulas and resizes rows to 85px for optimal scanning.
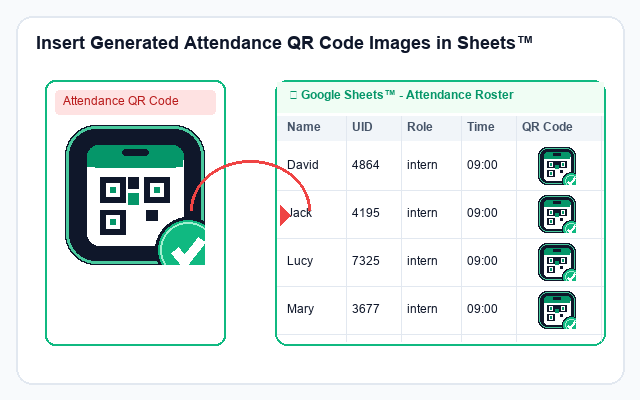
Print Physical ID Badges or Export to PDF
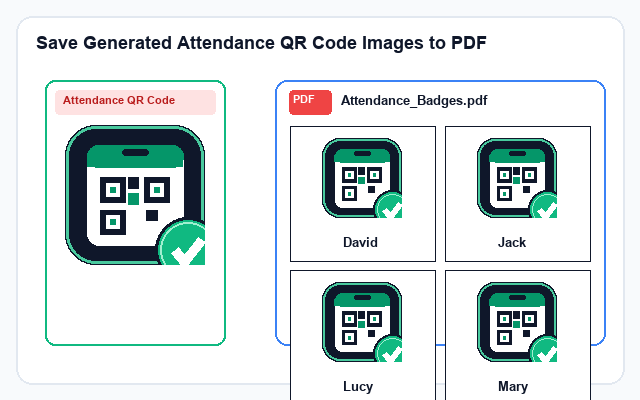
Want physical cards for students or staff to wear as lanyards or keep in their wallets?
Click Extensions > QR Code Attendance Tracking By ConvertSharp > 🖨️
Save Generated QR Code Images to PDF.
A print preview modal opens with custom grid layout choices:
- 2x2 Grid: Large lanyard ID badges with big photos & QR codes.
- 2x4 Grid: Standard student ID card size (8 badges per A4 page).
- 3x4 Grid: Compact sticker sheets (12 badges per page).
Click Print / Save to PDF to print directly or download an A4 PDF document, or click Save to Drive PDF to save the file straight into your Google Drive™.
Mobile Phone Check-in (Smartphone Scanning)
Students or employees simply point their smartphone camera at their QR badge:
- The mobile check-in web application loads instantly in their browser with their name and a live digital clock.
- The device automatically retrieves HTML5 GPS coordinates (e.g., 21.0285°N, 105.8542°E) and verifies their physical presence.
- They tap ✅ Check In (or let the 1-second auto check-in fire).
- A green celebration checkmark screen confirms that attendance has been recorded directly into your Google Sheet!
Live Webcam Laptop Scanner (For Classroom Doors)
If you prefer to stand at the classroom or office door and scan badges as people enter:
Click Extensions > QR Code Attendance Tracking By ConvertSharp > 📷 Live Webcam Attendance Scanner to open the sidebar.
- Point physical student cards or phone screens in front of your laptop webcam.
- The scanner triggers an audio chime on every successful scan.
- Real-time attendance stats (Present, Total Roster, Late) update instantly in the sidebar header!
100 Free Scans Trial & Pro License Activation
New users receive 100 free attendance scans to fully test all mobile, webcam, and spreadsheet features. Once the 100 scans are completed, an upgrade to Pro is required to continue scanning.
In Google Sheets, go to Extensions > QR Code Attendance Tracking By ConvertSharp > 💎 Buy Pro License. Select your preferred plan:
- Plus Monthly: $5.00 / month
- Plus Annual: $48.00 / year (Best Value - Save 20%)
- Pro Lifetime: $96.00 one-time payment (Unlimited permanent access)
After purchasing through secure Lemon Squeezy checkout, enter your purchase email or license key into the Activate License box to immediately unlock unlimited scans.
Shift Rules & Leniency Settings
Click Extensions > QR Code Attendance Tracking By ConvertSharp > ⚙️ Shift & Leniency Settings to customize:
- Standard Shift Start Time: Default expected arrival time (e.g., 09:00).
- Grace Period (Leniency): Minutes allowed after the scheduled time before being flagged as Late (e.g., 15 minutes).
- Require Geolocation (GPS): Ensure attendees are physically present on site.
- 1-Second Auto Check-in: Instant check-in upon loading the camera screen.